
Week 4: Arduino Programming
Assignment Overview
This week’s assignment was to program an Arduino board to perform a task. The Arduino Projects Book was suggested as a starting point, and the assignment provided an opportunity to build a new iteration of a previous project.
Project Implementation
Concept: I used this week to implement a 2-bar linkage, which is foundational to the clothes folding robot for my final project. The linkage is designed to demonstrate the mechanical movement required in the robot.
Video/GIF: Below is a gif capturing the movement of the 2-bar linkage:
Code Snippets:
```cpp #include
Servo servo; int restPos = 90; int foldPos = 30; int servoPin = 32; int buttonPin = 33; int lastVal; int currVal;
void setup() { // Set up servo ESP32PWM::allocateTimer(0); servo.setPeriodHertz(50);
servo.attach(servoPin, 500, 2400); servo.write(restPos);
// Set up button pinMode(buttonPin, INPUT_PULLUP); lastVal = digitalRead(buttonPin); }
void loop() { currVal = digitalRead(buttonPin);
// Detect rising edge (button press) if (lastVal == LOW && currVal == HIGH) { servo.write(foldPos); delay(800); servo.write(restPos); delay(400); }
lastVal = currVal; } ```
Schematic
Servo Motor Circuit: The schematic for the servo motor is simple and can be found online. Below is an image of the schematic:
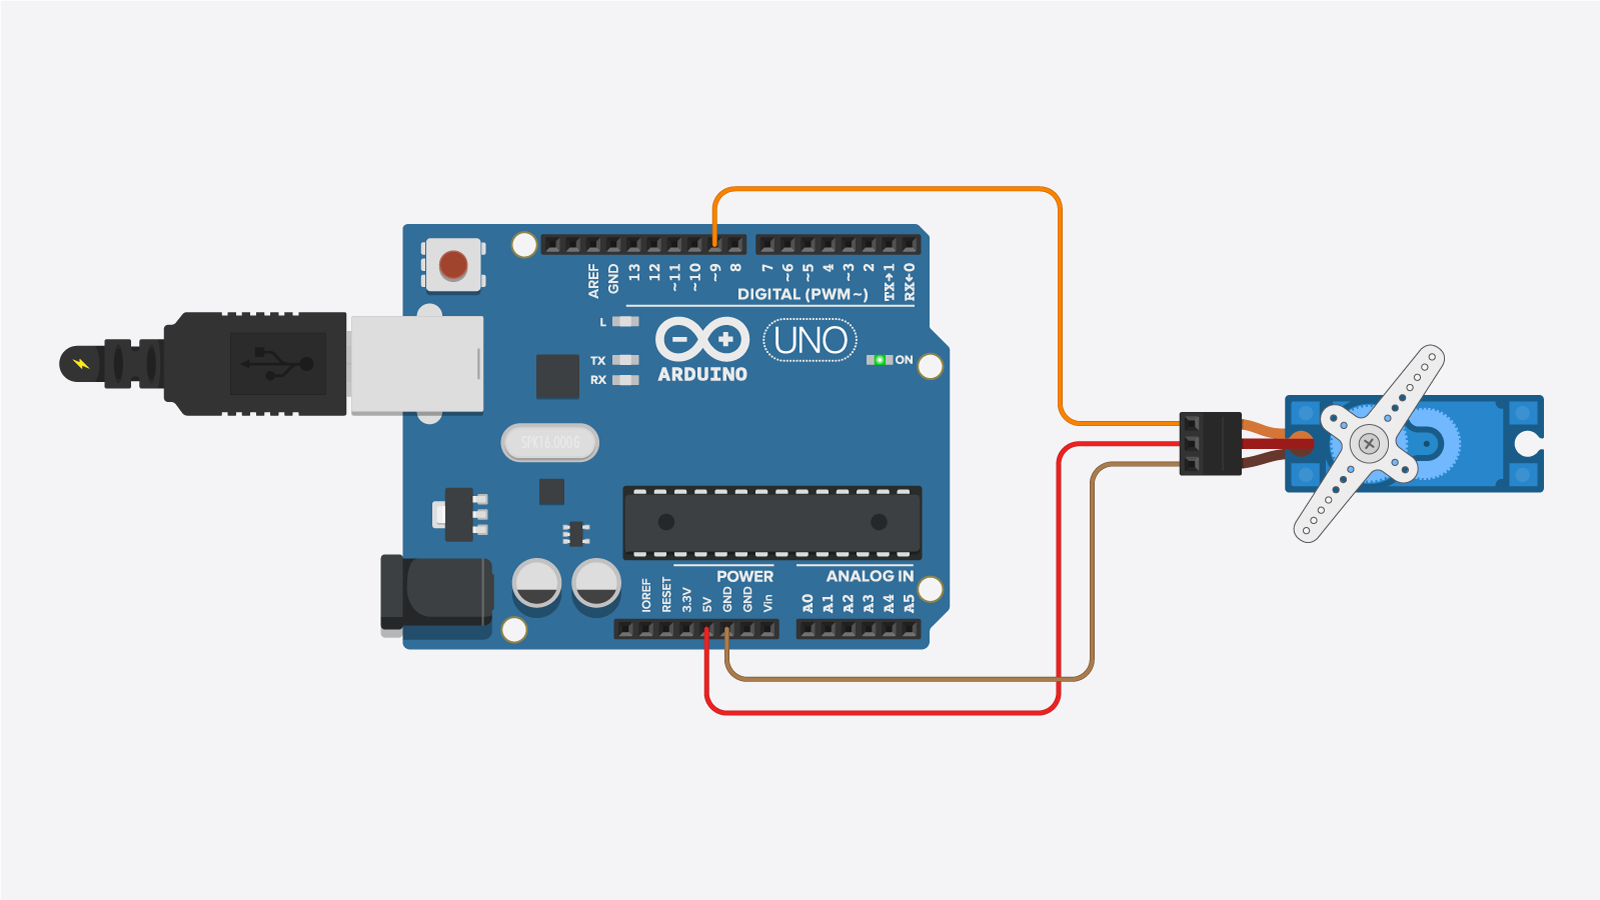
Button Wiring: Additionally, I wired a button to easily activate the motion of the linkage.